There’s such beauty in the simplicity of a great roasted chicken breasts, hugged by a sauce generated from its own comforting flavors. (Ugh I think that was the most Pioneer Woman-esque sentence I’ve ever written). That being said…for a simple dish, there are a lot of steps needed to bang this out and a handful of places where it can all go wrong. Don’t worry though, ya girl Chelsea’s here to troubleshoot for you. Here’s the four main things to keep in mind:
- The Cut. This recipe is not for boring and deceptively expensive boneless skinless breasts. Chicken thighs and legs are delicious, but for another post. You need skin-on split breasts for this–don’t worry, I’ll show you how to de-bone them.
- Get A Thermometer Already! Your chicken, steaks, pork chops, everything you sear, grill, or roast will never taste good until you shell out the whole $15 for an oven-safe thermometer on a wire, so you can check the temperature without having to constantly open and close the oven. Plus you can set an alarm, so you’ll know the very second your meat comes to temperature. One of the most important tools you can have! It’s the trick to having perfectly done, moist meat.
- The Pan Sauce. Yup, that mystical and delicious thang. I’ll be honest, even with a little help from my buddies gelatin and cornstarch (thanks Kenji!) it still sometimes doesn’t thicken up the way I want it to. If I were REALLY looking for a viscous gravy I could take a roux thickening approach, but that will yield a really heavy sauce. Unless you’re serving mashed potatoes it’s really unnecessary. Your pan sauce will still pack an awesome punch of flavor even if it doesn’t turn into a restaurant-like syrupy glaze.
- Time. Because there’s butchery and chopping of vegetation involved, plan for about 45 mins to an hour for this to all come together. Good things can’t be rushed!
You’ll Need
- Skin on split chicken breasts, one per person
- Kosher salt and several grinds of pepper
- Olive oil
- A small shallot
- A clove of garlic
- 1/2 a cup of white wine
- 1/2 a cup of chicken broth
- 1 packet of gelatin (optional but helpful)
- 2 tablespoons of butter
- A little cornstarch
- Soy sauce (trust)
- Honey
- 2-3 tablespoons of fresh herbs, whatever is at hand (parsley, chives, tarragon, dill, or rosemary)
The Method
- Set the oven for 425 degrees F. Pour the chicken broth into a cup with the gelatin, whisking together with a fork. It’ll need some time to gently re-hydrate. Chop the shallots, garlic, and herbs.
- Nextt we’ve got to de-bone the chicken. Basically, you’re going to make a diagonal slice through the chicken, as close to the bones as possible, in fluid strokes so the portion doesn’t get all hacked up. Hold the sharpest knife you have with your dominant hand, and wrap the other hand in a towel, using it to stabilize the meat. Go slowly, separating the breast and the bones like a book. When you’re almost all the way through, your knife will hit a small rogue bone–use small controlled cuts to gently remove it. Now you’ve got yourself a skin on chicken breast, just like the restaurants! Okay not like the restaurants, if this is your first time doing this is probably looks like an uneven piece of crap. It gets wayyyy easier with practice, you’ll be an expert in no time. Flip the chicken over, there will be a distinctive “loose” section. That would be the chicken tender. Pull that off and throw in a plastic bag in the fridge to cook later in the week. Coincidentally, it should make your chicken portion more even! Even meat = even cooking. Check out this link for more in-depth instructions.
- Toss a few good glugs of olive oil in an oven-safe frying pan and set it over medium heat. Salt and pepper both sides of your newly butchered chicken breasts and put them in the pan, skin side down. Fry until the skin is golden and crisp, about 5-6 minutes. You’ll know when it’s ready because the chicken will release easily from the pan, not sticking at all. Monitor this stage carefully–you want golden chicken skin, not burned! Flip the chicken over, insert your thermometer into the center of the thickest part of one of the breasts, then cook until the thermometer hits 158 degrees F. Remove from the oven and set on a plate or a cutting board to rest for 10-15 minutes, or however long it takes you to make the pan sauce. The chicken’s temperature will spike another 10 degrees or so as it sits, finishing the chicken then redistributing the juices as it cools. Note: if you’re cooking for a big crowd, you can skip the frying pan part and stick the seasoned chicken skin-side up in a roasting straight into the oven. Broil the last few minutes of cook time to get that crunchy, golden brown skin. The pan sauce will turn out a little less chicken-y, but that’s a small sacrifice if you’re entertaining.
- Set the same chicken pan over medium heat with some olive oil and whatever is left in the pan (all that juice, chicken fat, and browned bits are a flavor goldmine!). Keep an oven mitt handy for adjusting the pan–the handle will be super hot! Sauté the shallot in the pan for 8 minutes, adding the garlic for the last 2. Add the wine, and use a wooden spoon or a whisk to scrape up all the browned bits from the bottom of the pan. (PS, this is called deglazing!!). Add the gelatin-y broth, crank up heat to medium high, and let the liquid bubble and reduce by about half.
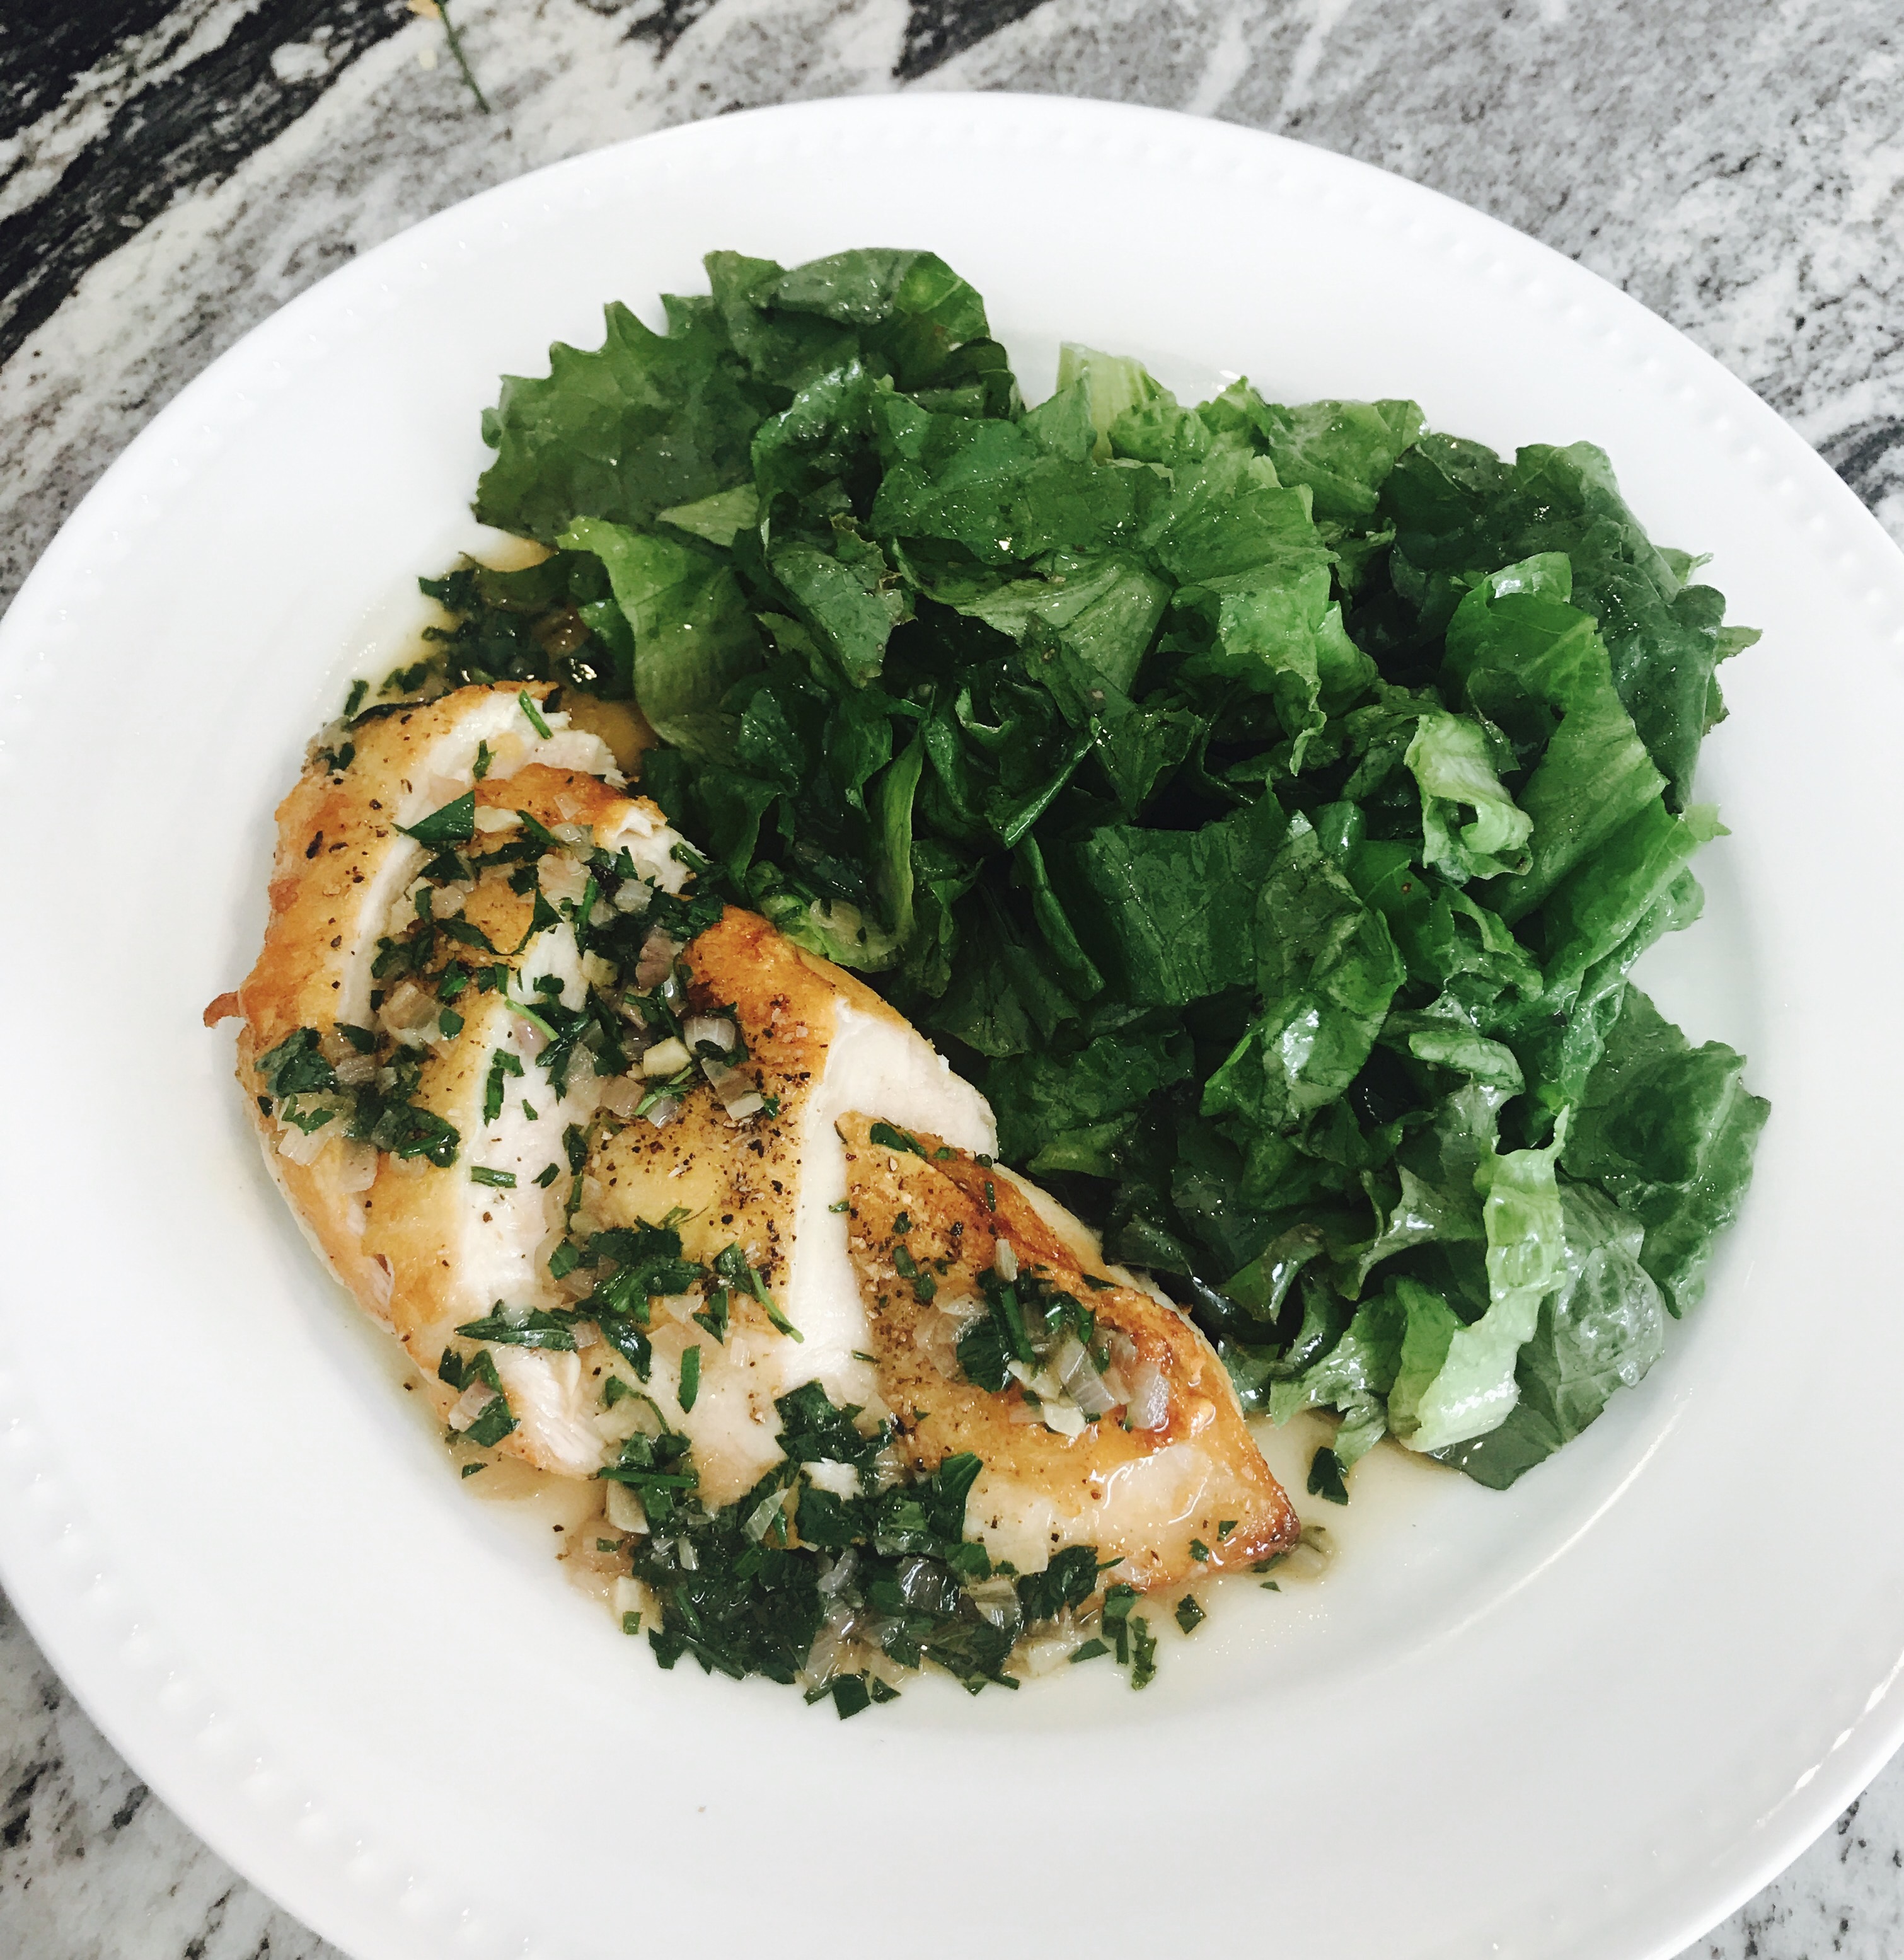
- Drop the butter into a small bowl of cornstarch so it’s nice and coated with it, then add to the pan sauce along with a splash of soy sauce (umami bomb!) and a little drizzle of honey. Let the cold butter bubble with the sauce, at a hard boil for at least 30 seconds. Cut the heat, then add the chopped herbs, stirring constantly. This sauce will thicken like whoa as it sits, so slice up the chicken and serve soon after you finish. This would be clutch with roasted potatoes, roasted veggies, and a simple salad on the side. Pan sauce love for all!
Remix The Dish: this is the recipe for a classic and simple pan sauce, but there’s a million ways to tweak it depending on what flavor you’re going after. Try adding in Dijon mustard, orange marmalade, blackberry or cherry preserves, red wine, maple syrup, or vinegar. Taste and taste again to identify what’s missing, and use your brain and your pantry to tweak it until it tastes the way you want it to.


Also: here’s a funny little Snapchat video of me making this. The production value is just outstanding.


[…] you wanted to go real fancy with the sauce, treat it like a pan sauce and simmer it in a frying pan with shallots, garlic, herbs, and some butter. I just […]
LikeLike
I’m no longer certain where you are getting your info, however great topic. I must spend a while finding out more or figuring out more. Thank you for great information I used to be on the lookout for this information for my mission.
LikeLike
You really make it appear so easy with your presentation but I to find this matter to be really something that I believe I might never understand. It kind of feels too complicated and very huge for me. I am taking a look ahead for your next post, I’ll try to get the grasp of it!
LikeLike
I have been exploring for a little bit for any high quality articles or blog posts on this kind of area . Exploring in Yahoo I at last stumbled upon this site. Studying this information So i’m satisfied to convey that I’ve a very just right uncanny feeling I came upon just what I needed. I most unquestionably will make certain to do not overlook this site and give it a look regularly.
LikeLike